Just a little while back, we dove into this adventure of gutting and remodeling a 1984 Dolphin motor home that had served as a temporary house for hurricane Irma victims. We spotted her in the parking lot of one of our local grocery stores, where one of the over one thousand families that lost their home were living. They had received a FEMA trailer, and were selling their dolphin to recoup their purchase monies.
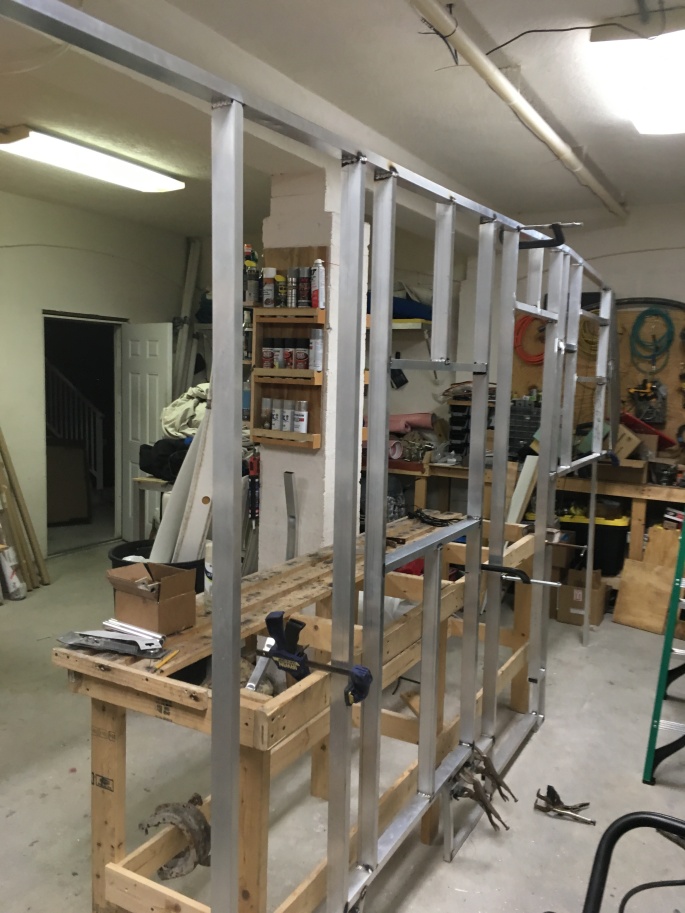
Gutting became rebuilding, and we undertook the task of fabricating a new body; upgraded to lightweight and waterproof aluminum with a 2″ wall thickness. We also purchased nearly every engine part needed to perform a complete and “deep” tune up to awake our Toy power plant. (haha) We knew it would be a while until we could address the mechanical maintenance due mostly to the fact that we need to get the interior dried in to prevent water damage to the cab. The framework for the body is coming along well and is teaching me first hand that this undertaking is quite a bit more complicated than initially meets the eye. Windows, openings, weight distribution, roof vent placement and arrangement along with wiring considerations are all part of the fun. It is coming along well, and the learning aspect of this process has been fantastic. As you read in our previous post, (if you haven’t then you should read it), we have been incredibly fortunate and are immensely thankful for our luck in meeting our new friends, Erica and Calvin Rowley. Calvin is a Toyota 22R wizard in my opinion and with his knowledge and love for these die hard power plants; ours is getting a new lease on life. (check out Erica and Calvin’s blog: http://chasingbootyadventures.com/
After asking Calvin and Erica if they would be interested in helping us out with the engine work; we took a look at the condition. Well, more accurately, Calvin took a pretty deep look. The doctors’ findings were not great, or even good for that matter. Coolant in the oil, several of the systems under the hood were incorrectly connected, or not properly operating at the least. He gave it to us straight and pretty much informed us that this project would require a top to bottom renovation as well. Out came the engine, and apart came most everything else under the hood. The engine has been inspected internally, and any questionable parts are being replaced.
Engine work and engine bay upgrades:
All new gaskets, including the head gasket; new oil and water pumps; upgrade to double row timing chain; Weber 34/36 with jet kit for economy/ power fine tuning; fuel regulator; new fuel pump; valve job; complete and proper de-smog; upgrade to heavy duty gm brake master cylinder, upgrade to 160 amp heavy duty Gm alternator, upgrade to electric fan kit with thermostat control; eliminate smog air pump; eliminate in cab air conditioner and compressor; ceramic coated equal length headers; stainless steel low restriction muffler and aluminum exhaust pipe; (2.25 inches diameter).
Suspension work and upgrades:
New front and rear shocks; new rear inner and outer bearings; change rear dif oil, new rear brakes, inspect and repack front bearings, new upper and lower ball joints, new steering stabilizer, new air lift rear system with in cab air controls, inspect and check front brakes.
Frame work and upgrades:
We have completely removed the camper from the frame. We also removed the floor from the frame chassis. There were spots in the floor that were “spongy” and since we were faced with the choice of replacing the floor we chose to take advantage of the extra work space. (the space to install the air bags, reinforce the floor support, and re-wire the vehicle tail light wiring.)
This past weekend we have painted the frame and we are in the process of installing floor supports. Calvin is in the assembly phase of the engine and is preparing to re-install the engine in the coming days. For the floor frame system, we are using aluminum for weight savings to fabricate the bracing. We are also going to try a composite floor to save weight and increase interior comfort. We are fabricating the floor using a 1/2″ sheet of marine plywood, 3/4″ thick rigid foam insulation with 3/4″ x 3/4″ aluminum support stiffeners, and sandwiched with another 1/2″ sheet of marine plywood on top. We plan on gluing the floor panels together. The exterior bottom of the floor panels will have .040 aluminum sheeting to protect the floor from water and deterioration. Hopefully the result will be a well insulated, strong and light floor system.